 |
|
 03-02-2017, 09:55 PM
|
#921
|
|
Member
Join Date: May 2016
Location: Plano
Posts: 13
Texas
|
Level Up Control Panel Relocation
I've made several mods to our V4000, but relocating the Level Up control panel is by far my favorite. I have chronic neck issues and ducking my head into the basement to see the control panel was becoming the worst part of setting up and breaking down. To solve the problem, I moved the control panel to a plastic enclosure mounted to a small TV swing arm mount. Now I can pull the control panel out of the basement without ducking and can easily operate it while watching the jacks and trailer.
Copy my example at your own risk.
I bought the Serpac brand plastic enclosure at Frys, the TV mount on Amazon and miscellaneous hardware at Lowes. I disconnected the AC power and the battery, then removed the Level Up control panel and bezel and finally disconnected the connector at the back of the control panel. I lined up the Level Up bezel with the Serpac plastic enclosure, marked the mounting holes, drilled them and eyeballed where I would need to trim the plastic enclosure so that the Level Up bezel would fit. I used a Dremel to make the cut out in the plastic enclosure. I drilled holes in the back of the plastic enclosure and mounted it to the TV swing arm. I test assembled everything on the kitchen table then installed the TV mount in the basement. There is a 1 x 2 stud behind the basement wall just inside of the curb side basement door that is substantial enough to support the weight of the mount and control panel. There is just enough room for the basement door strut to clear everything when the door is closed. There is about 4 feet of slack in the control panel cable, I added another layer of split loom plastic to the cable to protect it, I then fished the cable through a hole I drilled in the Serpac plastic enclosure, then through the Level Up Bezel and plugged it into the control panel. I tie wrapped the cable to the TV swing arm with plenty of slack so that it doesnt get pinched or bound. I reconnected the battery and tested.
It has been a few weeks since the mod and so far so good, I adjusted the tension on the TV swing arm mount so that it pulls out easily, but doesnt seem to move at all while on the road.
If anyone wants more pictures of any of the parts PM me.
__________________
__________________
2015 Voltage V4000
2015 F350 Lariat High Capacity DRW
|

|

|
|
03-02-2017, 10:10 PM
|
#922
|
|
Member
Join Date: May 2016
Location: Pioneer
Posts: 41
California
|
Quote:
Originally Posted by Bluefinger

I've made several mods to our V4000, but relocating the Level Up control panel is by far my favorite. I have chronic neck issues and ducking my head into the basement to see the control panel was becoming the worst part of setting up and breaking down. To solve the problem, I moved the control panel to a plastic enclosure mounted to a small TV swing arm mount. Now I can pull the control panel out of the basement without ducking and can easily operate it while watching the jacks and trailer.
Copy my example at your own risk.
I bought the Serpac brand plastic enclosure at Frys, the TV mount on Amazon and miscellaneous hardware at Lowes. I disconnected the AC power and the battery, then removed the Level Up control panel and bezel and finally disconnected the connector at the back of the control panel. I lined up the Level Up bezel with the Serpac plastic enclosure, marked the mounting holes, drilled them and eyeballed where I would need to trim the plastic enclosure so that the Level Up bezel would fit. I used a Dremel to make the cut out in the plastic enclosure. I drilled holes in the back of the plastic enclosure and mounted it to the TV swing arm. I test assembled everything on the kitchen table then installed the TV mount in the basement. There is a 1 x 2 stud behind the basement wall just inside of the curb side basement door that is substantial enough to support the weight of the mount and control panel. There is just enough room for the basement door strut to clear everything when the door is closed. There is about 4 feet of slack in the control panel cable, I added another layer of split loom plastic to the cable to protect it, I then fished the cable through a hole I drilled in the Serpac plastic enclosure, then through the Level Up Bezel and plugged it into the control panel. I tie wrapped the cable to the TV swing arm with plenty of slack so that it doesnt get pinched or bound. I reconnected the battery and tested.
It has been a few weeks since the mod and so far so good, I adjusted the tension on the TV swing arm mount so that it pulls out easily, but doesnt seem to move at all while on the road.
If anyone wants more pictures of any of the parts PM me.
|
I love it!! Great idea!! There isn't even a light in the area close to my level up controls.....yet.
Congrats!!
__________________
__________________
'01 Dodge 3500 dually
2016 V3805
1987 Chenowth desert buggy
|
|
|
|
|
03-02-2017, 10:42 PM
|
#923
|
|
Senior Member
Join Date: Aug 2013
Location: Memphis
Posts: 1,616
Michigan
|
Quote:
Originally Posted by Bluefinger
I've made several mods to our V4000, but relocating the Level Up control panel is by far my favorite. I have chronic neck issues and ducking my head into the basement to see the control panel was becoming the worst part of setting up and breaking down. To solve the problem, I moved the control panel to a plastic enclosure mounted to a small TV swing arm mount. Now I can pull the control panel out of the basement without ducking and can easily operate it while watching the jacks and trailer.
Copy my example at your own risk.
I bought the Serpac brand plastic enclosure at Frys, the TV mount on Amazon and miscellaneous hardware at Lowes. I disconnected the AC power and the battery, then removed the Level Up control panel and bezel and finally disconnected the connector at the back of the control panel. I lined up the Level Up bezel with the Serpac plastic enclosure, marked the mounting holes, drilled them and eyeballed where I would need to trim the plastic enclosure so that the Level Up bezel would fit. I used a Dremel to make the cut out in the plastic enclosure. I drilled holes in the back of the plastic enclosure and mounted it to the TV swing arm. I test assembled everything on the kitchen table then installed the TV mount in the basement. There is a 1 x 2 stud behind the basement wall just inside of the curb side basement door that is substantial enough to support the weight of the mount and control panel. There is just enough room for the basement door strut to clear everything when the door is closed. There is about 4 feet of slack in the control panel cable, I added another layer of split loom plastic to the cable to protect it, I then fished the cable through a hole I drilled in the Serpac plastic enclosure, then through the Level Up Bezel and plugged it into the control panel. I tie wrapped the cable to the TV swing arm with plenty of slack so that it doesnt get pinched or bound. I reconnected the battery and tested.
It has been a few weeks since the mod and so far so good, I adjusted the tension on the TV swing arm mount so that it pulls out easily, but doesnt seem to move at all while on the road.
If anyone wants more pictures of any of the parts PM me.
|
Very nice. I've been wanting to relocate mine for awhile now. Not sure where yet, but I like this idea!
Sent from my SM-G920V using Tapatalk
__________________
2019 Ram 3500 Limited w/ Max Tow pkg
2005 Cardinal 33LX
2014-3950, Full Paint, 17.5" tires, 370W solar, 3100W Magnum inverter w/ AGS, 7500w diesel generator, Micro-Air Easy Start 364 (x3) SOLD!
|
|
|
|
|
03-05-2017, 03:43 PM
|
#924
|
|
Senior Member
Join Date: Dec 2016
Location: Seffner
Posts: 174
Florida
|
Quote:
Originally Posted by donzinger
Very nice. I've been wanting to relocate mine for awhile now. Not sure where yet, but I like this idea!
Sent from my SM-G920V using Tapatalk
|
Now that is slick!!! And useful!
Sent from my iPhone using Tapatalk
__________________
2013 VOLTAGE 3905 EPIC III
T/V: 2011 RAM 3500 DRW LONGHORN LARAMIE
FULLY DELETED AND H&S MINI MAXX, AFE INTAKE, 5" TURBO BACK
ANDERSON ULTIMATE FIFTH WHEEL CONECTION
|
|
|
|
|
05-27-2017, 06:26 AM
|
#925
|
|
Member
Join Date: Aug 2016
Location: NE CA
Posts: 13
California
|
Awning & Step LED
In an effort is "keep up with the Joneses" I just had to have LEDs under the awning and steps as my 3200 was lacking in both areas. The step lights were the easiest....cut the wires from the OEM orange marker lights, connect to the LED strip and viola let there be light.
The awning lights a bit more involved. Feed wire down the front awning arm. Drilled a hole through the wall next to the awning power (at the bottom of the arm). Wire was then feed through the LPG compartment to the batteries in the front compartment . The wireless LED controller (UHF) lives in the front compartment and still has great coverage (30+ ft so far).
(not sure why the awning pics a horizontal....the arms are vertical I swear)
|
|
|
|
|
05-27-2017, 12:01 PM
|
#926
|
|
Senior Member
Join Date: Feb 2017
Location: Sanger
Posts: 376
Texas
|
Quote:
Originally Posted by Edewing
In an effort is "keep up with the Joneses" I just had to have LEDs under the awning and steps as my 3200 was lacking in both areas. The step lights were the easiest....cut the wires from the OEM orange marker lights, connect to the LED strip and viola let there be light.
|
Eris, got to have the blue step LED's. Source please!
__________________
Chris & Donna
2014 Voltage Epic 3990, 600AH LifeBlue, 1895W Solar, 3K Magnum w/AGS, 3X Micro-Air ES
2018 RAM 3500 Laramie Sport Crew Cab 6.7 Cummins, AISIN 4X4 DRW 4.10 Long Bed Dually
|
|
|
|
|
05-27-2017, 04:58 PM
|
#927
|
|
Member
Join Date: Aug 2016
Location: NE CA
Posts: 13
California
|
Quote:
Originally Posted by CSCLARK
Eris, got to have the blue step LED's. Source please!
|
"Aspect LED" single color (blue) IP68 waterproof. I bought the 16' roll and cut to length.
__________________
2012 3200 Epic, full paint Mods: awning LEDs, exterior DVD/stereo.
2005 F250 6.0 Bullet proof, Anderson hitch SOLD
2016 F350 6.7, Anderson Ultimate Hitch
|
|
|
|
|
05-27-2017, 06:59 PM
|
#928
|
|
Senior Member
Join Date: Feb 2017
Location: Sanger
Posts: 376
Texas
|
Thanks Eric
Sent from my LGLS676 using Tapatalk
__________________
Chris & Donna
2014 Voltage Epic 3990, 600AH LifeBlue, 1895W Solar, 3K Magnum w/AGS, 3X Micro-Air ES
2018 RAM 3500 Laramie Sport Crew Cab 6.7 Cummins, AISIN 4X4 DRW 4.10 Long Bed Dually
|
|
|
|
|
05-31-2017, 02:25 PM
|
#929
|
|
Senior Member
Join Date: Aug 2013
Location: Sanger
Posts: 258
Texas
|
Quote:
Originally Posted by Edewing
In an effort is "keep up with the Joneses" I just had to have LEDs under the awning and steps as my 3200 was lacking in both areas. The step lights were the easiest....cut the wires from the OEM orange marker lights, connect to the LED strip and viola let there be light.
The awning lights a bit more involved. Feed wire down the front awning arm. Drilled a hole through the wall next to the awning power (at the bottom of the arm). Wire was then feed through the LPG compartment to the batteries in the front compartment . The wireless LED controller (UHF) lives in the front compartment and still has great coverage (30+ ft so far).
(not sure why the awning pics a horizontal....the arms are vertical I swear)
|
I have a very manual and pain in the butt set-up for awning led's. I really like your set-up. Which lights did you go with and how are they attached?
__________________
2013 Voltage 3200
2014 Ford F350 DRW
www.facebook.com/VoltageToyHauler
|
|
|
|
|
05-31-2017, 10:13 PM
|
#930
|
|
Site Team
Join Date: Jun 2014
Location: Sprung Leak
Posts: 3,157
North Carolina
|
For awning lights I like the Boogey Lights, not the cheapest, but you can't beat the quality and the available options. I haven't ordered mine yet, but I have a couple of buddies that are using them and love them.
Aaron 
__________________
There is madness to my methods
2015 Coleman CM16FBS(traded) 2016 Concord 300DS
2015 Ford Fusion Hybrid following along
|
|
|
|
|
06-01-2017, 12:04 AM
|
#931
|
|
Senior Member
Join Date: Aug 2013
Location: Memphis
Posts: 1,616
Michigan
|
Quote:
Originally Posted by CSCLARK
Eris, got to have the blue step LED's. Source please!
|
Believe it or not, Walmart sells a two pack of Blue LED lights perfect for this in the auto department.
__________________
2019 Ram 3500 Limited w/ Max Tow pkg
2005 Cardinal 33LX
2014-3950, Full Paint, 17.5" tires, 370W solar, 3100W Magnum inverter w/ AGS, 7500w diesel generator, Micro-Air Easy Start 364 (x3) SOLD!
|
|
|
|
|
06-01-2017, 01:38 AM
|
#932
|
|
Senior Member
Join Date: Feb 2017
Location: Sanger
Posts: 376
Texas
|
Quote:
Originally Posted by donzinger
Believe it or not, Walmart sells a two pack of Blue LED lights perfect for this in the auto department.
|
That's super thanks Don
Sent from my LGLS676 using Tapatalk
__________________
Chris & Donna
2014 Voltage Epic 3990, 600AH LifeBlue, 1895W Solar, 3K Magnum w/AGS, 3X Micro-Air ES
2018 RAM 3500 Laramie Sport Crew Cab 6.7 Cummins, AISIN 4X4 DRW 4.10 Long Bed Dually
|
|
|
|
|
06-01-2017, 04:46 AM
|
#933
|
|
Member
Join Date: Aug 2016
Location: NE CA
Posts: 13
California
|
Quote:
Originally Posted by soonernation
I have a very manual and pain in the butt set-up for awning led's. I really like your set-up. Which lights did you go with and how are they attached?
|
I used a RGB strip for 12V which I attached with a silicone adhesive....which is holding amazingly well. I chose the fully water proof strip (IP 68) which is entirely encased in a silicone type material which 3M double stick tape will not stick to (tried it).
I used four 18G wires (power, red, green, blue) for the connection which barely fit behind the awning bracket. If you were looking to use a RGBW (has white lights also) there will be an additional wire which in order to fit you would need a lesser gauge wire maybe 20G to make it fit. Electrical is not my strongest area so I would ask (or maybe someone else could chime in) on the safest gauge wire for a 16' strip....I know they don't draw much.
__________________
2012 3200 Epic, full paint Mods: awning LEDs, exterior DVD/stereo.
2005 F250 6.0 Bullet proof, Anderson hitch SOLD
2016 F350 6.7, Anderson Ultimate Hitch
|
|
|
|
|
06-01-2017, 04:52 AM
|
#934
|
|
Member
Join Date: Aug 2016
Location: NE CA
Posts: 13
California
|
Quote:
Originally Posted by donzinger
Believe it or not, Walmart sells a two pack of Blue LED lights perfect for this in the auto department.
|
That was the first place I checked....but in our little town that wasn't happening. So I went to the store next door named "The Internet" (very busy place in our neck of the woods) where the selection was unreal. 
__________________
2012 3200 Epic, full paint Mods: awning LEDs, exterior DVD/stereo.
2005 F250 6.0 Bullet proof, Anderson hitch SOLD
2016 F350 6.7, Anderson Ultimate Hitch
|
|
|
|
|
06-01-2017, 07:22 PM
|
#935
|
|
Senior Member
Join Date: Aug 2013
Location: Memphis
Posts: 1,616
Michigan
|
Serpac enclosure
Which model Serpac did you use? There are literally tons on their webpage!
Thanks!
__________________
2019 Ram 3500 Limited w/ Max Tow pkg
2005 Cardinal 33LX
2014-3950, Full Paint, 17.5" tires, 370W solar, 3100W Magnum inverter w/ AGS, 7500w diesel generator, Micro-Air Easy Start 364 (x3) SOLD!
|
|
|
|
|
06-03-2017, 06:05 AM
|
#936
|
|
Member
Join Date: Sep 2016
Location: Midland
Posts: 19
Michigan
|
added these under the couches to hang Bikes
|
|
|
|
|
06-06-2017, 10:15 PM
|
#937
|
|
Senior Member
Join Date: May 2017
Location: Buckeye
Posts: 69
Arizona
|
Quote:
Originally Posted by Edewing
That was the first place I checked....but in our little town that wasn't happening. So I went to the store next door named "The Internet" (very busy place in our neck of the woods) where the selection was unreal. |
Went to walmart the other day, and picked up the two pack of Blue LED's they had two types on display, I went with the brighter ones.
Removed the old orange puck lights and installed the strips under each set of steps, took about 15 minutes total.
Huge improvement for the understep lighting! 
Gear
__________________
2014 Voltage 3818 (Epic I & II)
2005 Fleetwood 31ASV BP Toy Hauler
2017 Ram 3500 Longhorn DRW, 4x4, 3.73, Aisin
4 Seat Long Travel Sand Rail, 97 Jeep TJ Rock Crawler, 68 Roadrunner, Various Quads
|
|
|
|
|
06-09-2017, 10:19 AM
|
#938
|
|
Senior Member
Join Date: Aug 2013
Location: Memphis
Posts: 1,616
Michigan
|
JT Strongarm kit finally installed! Was VERY easy...
Will see how they perform next weekend at MIS.
__________________
2019 Ram 3500 Limited w/ Max Tow pkg
2005 Cardinal 33LX
2014-3950, Full Paint, 17.5" tires, 370W solar, 3100W Magnum inverter w/ AGS, 7500w diesel generator, Micro-Air Easy Start 364 (x3) SOLD!
|
|
|
|
|
06-10-2017, 01:35 AM
|
#939
|
|
Senior Member
Join Date: May 2017
Location: Buckeye
Posts: 69
Arizona
|
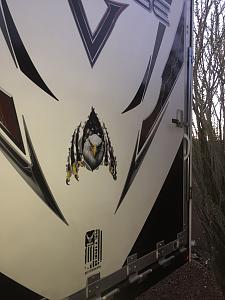
Added a couple decals to my Ramp Door.
__________________
2014 Voltage 3818 (Epic I & II)
2005 Fleetwood 31ASV BP Toy Hauler
2017 Ram 3500 Longhorn DRW, 4x4, 3.73, Aisin
4 Seat Long Travel Sand Rail, 97 Jeep TJ Rock Crawler, 68 Roadrunner, Various Quads
|
|
|
|
|
07-27-2017, 06:37 PM
|
#940
|
|
Senior Member
Join Date: Aug 2013
Location: Memphis
Posts: 1,616
Michigan
|
Got the Curt hutch installed. Pretty beefy and doubles as skid plates. Had to move the license plate over to clear it 
Sent from my SM-G920V using Tapatalk
__________________
2019 Ram 3500 Limited w/ Max Tow pkg
2005 Cardinal 33LX
2014-3950, Full Paint, 17.5" tires, 370W solar, 3100W Magnum inverter w/ AGS, 7500w diesel generator, Micro-Air Easy Start 364 (x3) SOLD!
|
|
|
|
|
|
 Posting Rules
|
You may not post new threads
You may not post replies
You may not post attachments
You may not edit your posts
HTML code is Off
|
|
|
|
 » Recent Discussions
 |
|
|
|
|
|
|
|
|
|
|
|
|
|
|
|
|
|
|
|
|
|
|
|
|
|
|
|
|
|
|
|


 Linear Mode

