Pirate here,
Finally, finally, got the trim I need to replace the beltline trim peeling off my 2014 Voltage Epic III 3800 Toyhauler.
I used information provided as answer to my request for info here on the forum. I have two sets of the wrong trim. One I am returning and one I am struck with.
So I thought I would share what I now have and information on how I am doing the replacement to make the trim last a whole lot longer than two years!
I went to Windish RV in Denver, CO where we bought the RV and asked the Parts guy what I needed. He ordered what Keystone said was the right stuff. Nope, instead of 1” trim it was ½” trim. So he worked with Keystone again and found that the original beltline trim for our 2014 RV was obsolete. Really? Fortunately he was able to make contact with the right person and get me another box of trim. This time the trim fits perfectly.
The trim comes in a box, a roll of the trim 60 ft long. I bought an entire box as I didn’t think it would hurt to have a little extra. The correct trim is:
Keystone:
PN 370564 TRIM SCREW COVER FLEXIBLE BLACK 60ft $0.41/ft $24.60
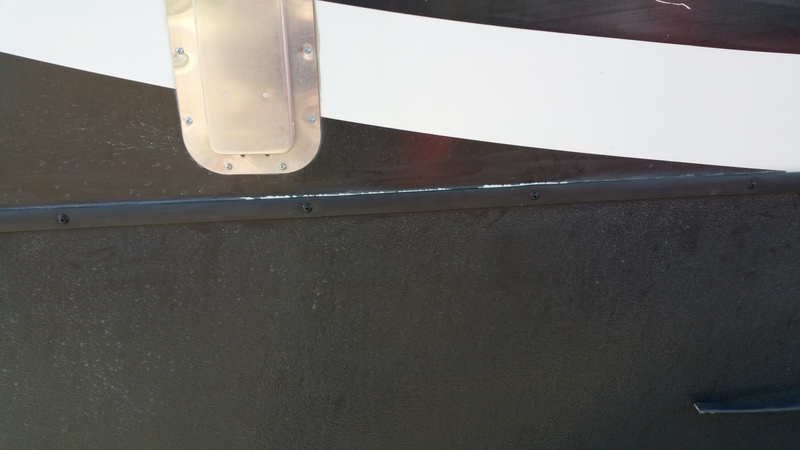
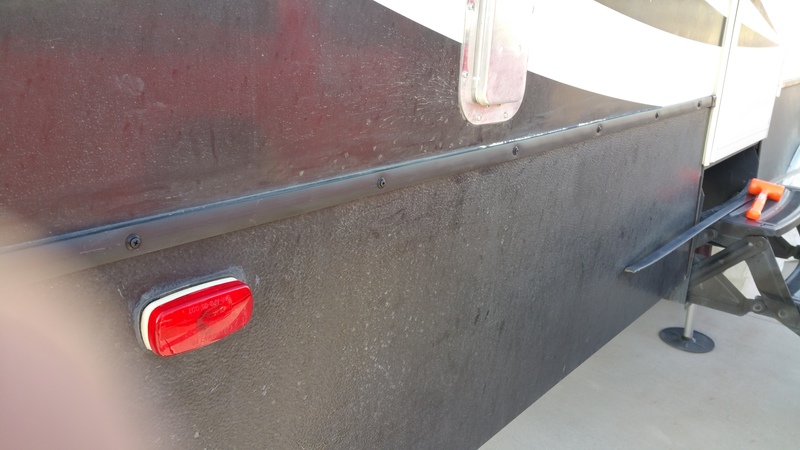
The pic below shows how much better the new trim is than the original:
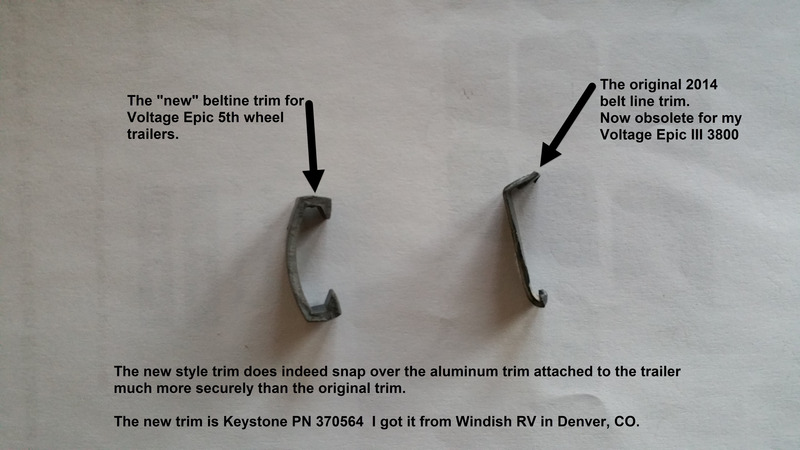
As you can see the new trim hooks over the upper and lower “lip” of the aluminum trim and stays put. Looking at the original trim. I have no idea how it was supposed to stay on.
Along with the trim, other suggested using black end caps available on eBay. Here’s that info:
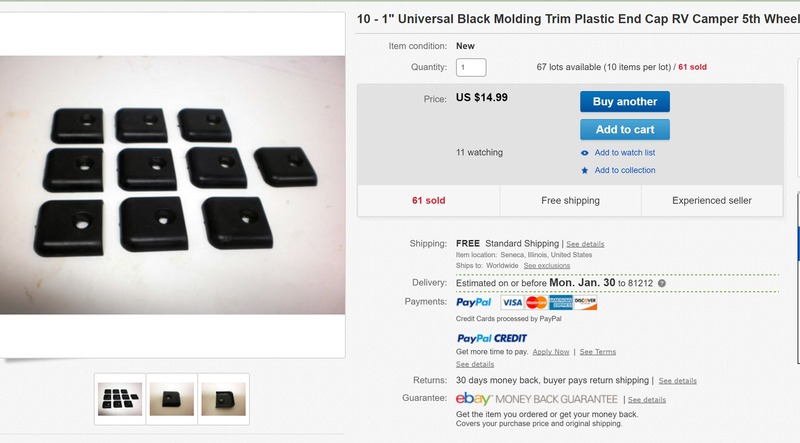
I ordered 3 sets of 10, all 30 came in one sealed bag. I think I need 24, so have a few spares.
Looking at the aluminum beltline strip I noted that Dutchman put screws every 6” the length of the aluminum.
Since every section of my trim shrank at each end. And remembering that expansion or shrinkage is always denoted as inches per inch. So the 74” piece shrank more than an inch. ½”+ at either end. So I thought that if I put an End Cap with screw on each end, and then another screw every 12 inches. That would greatly reduce shrinkage at the ends, because there is a screw retaining the trim within 12” of the End Cap.
Here is a slightly fuzzy pic showing the amount of shrinkage on the first piece of trim I replaced. That being passenger side, from the garage entry door to the ramp end of the trailer.
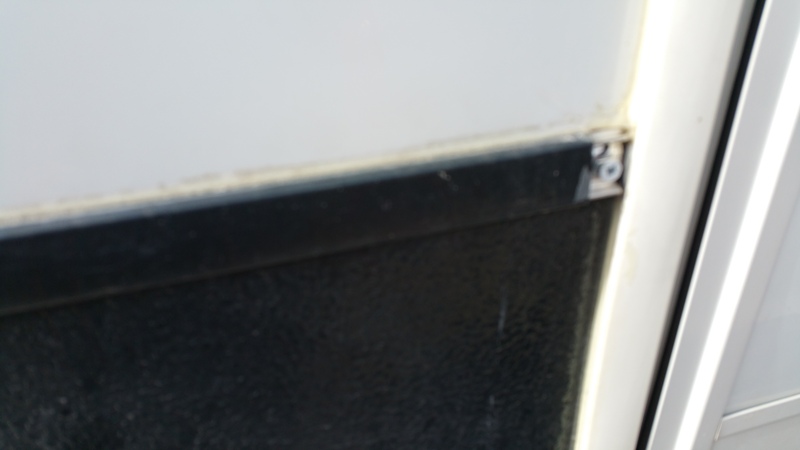
It took me two fingers and 10 seconds to pull this entire piece of trim off. Yeah, parked since September there are several pieces that have fallen off an litter the RV pad!
Before I go further, I’d like to share some of the tools I used for replacing the trim:
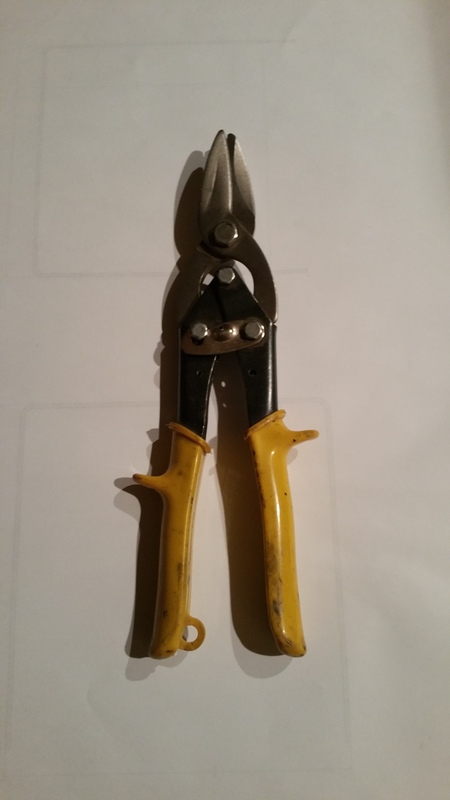
Yup, good ‘ol sheet metal shears. They make a very clean cut across the trim and can be used to trim the corners to fit under the End Caps if needed.
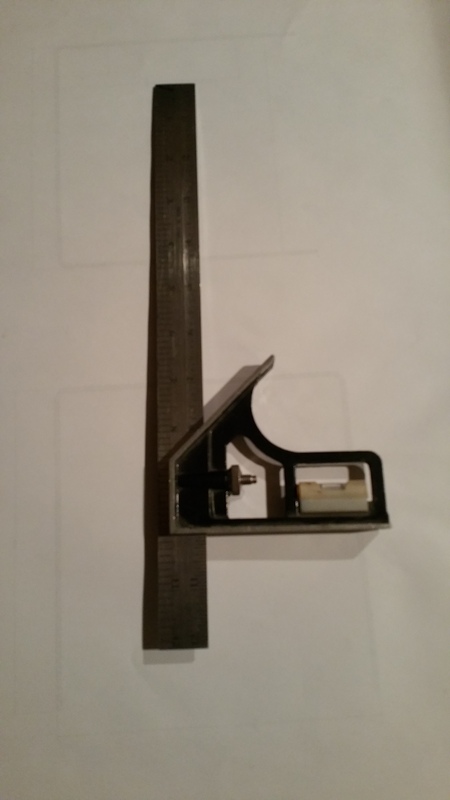
Yup, a good old adjustable square. I set the angle length at 2”, just for good measure. I used the 12” rule to lay out the distance between new screws and placed the device level square side on top of the new trim and used the closest ½” mark as the center for drilling a screw hole. More in a minute.
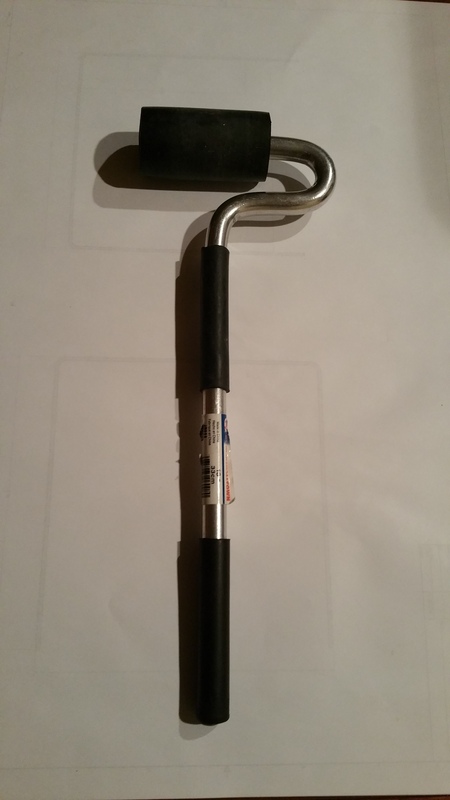
Above is a hard rubber roller I purchased for another project, but found it very useful for this one.
Since the new trim is on a roll, in a cardboard box, I started at one end. Put the trim over the aluminum trim starting at one end. I snapped about 6” over the aluminum so that I could slide it some an make sure it stayed at the end of the aluminum rail. I then held an End Cap over the new black trim and drilled the center with a 1/8” drill, Then used a black sheet metal screw to hold the End Cap and the new black trim to the side of the trailer.
From here I would snap about 15” of the new black trim over the Aluminum trim. Then use the hard rubber roller to smooth the trim working from the End Cap. Just makes things look a little better, assures both the top and bottom of the new black trim are snapped over the Aluminum trim.
Now I used the adjustable square rule to measure 12” from the center of the End Cap screw, then used the square the other way and drilled a hole ½” down or at the center of the new black trim.
A tip: I set the drill all the way into the chuck so that the minimum length of drill bit extended from the chuck. I did this because I have no idea what I might be drilling into, but the screws holding the Aluminum Trim to the trailer are 1” long. I had about 1 1/8” extending from the chuck.
So here’s the End Cap in place, the trim snapped over the Aluminum trim for about 15” and ready for the first screw.

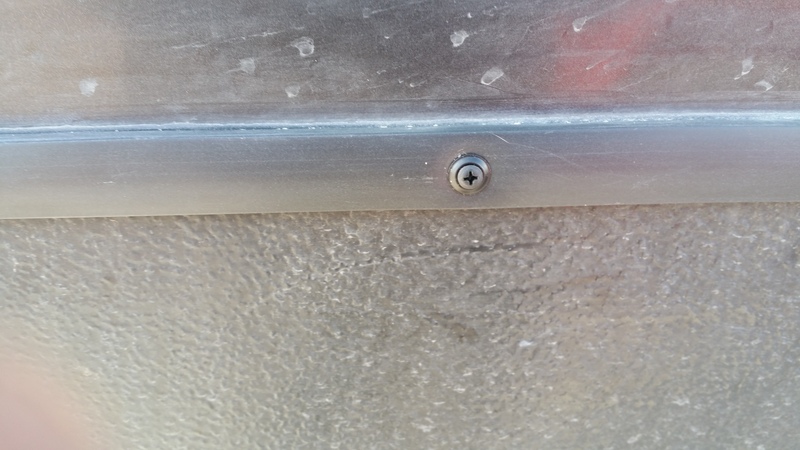
Here you can see that I’ve installed screws every 12”.
And here’s a close up of the screws I’m using.
I used a hand Phillips screwdriver to install the screws as I have just tightened them enough to have the washer tight to the trim, the screw tight to the washer, but not smashing the new black trim.
And here is that first piece of new trim installed and complete. Some dimpling of the new black trim. But seems a little difficult to avoid. Rolling the trim as I installed it does seem to make for a better finished look.
Above the new black trim you can see where some of the black graphic is missing. It peeled off with the old trim. It appears that Dutchman used a bead of some clear sealant along the top of the trim. Probably an effort to keep it from peeling off…yeah right! I will cover this with a bead of “black silicone”. Not black RTV, but silicone. I have learned in the last two years that “silicone” is very easy to smooth and clean up with Mineral Spirits. Very simple. I buy it in the tube that fits a caulking gun.
I got the screws for the end caps and for the black trim at my local Ace Hardware.
I did two long sections in about an hour. Figuring the process out, working on the shady side of the trailer in 37 degree weather. I think I’m smarter than to work outside in that cold, but decided to see how it worked out. Works just fine!
Got questions? Lemme know!
Pirate


 I think this problem has been kicked around for a couple of years here.

 Linear Mode


