Modifying the dinette - Dutchmen Owners
Journey with Confidence RV GPS App RV Trip Planner RV LIFE Campground Reviews RV Maintenance Take a Speed Test Free 7 Day Trial ×

Go Back   Dutchmen Owners > Dutchmen Technical | Towing, Maintenance and Repairs > Modifications and Upgrades
Click Here to Login
Reply
 
Thread Tools Display Modes
 
Old 06-14-2015, 03:17 AM   #1
Senior Member
 
gazingm42's Avatar
 
Join Date: May 2013
Location: State of confusion
Posts: 82
Utah
Modifying the dinette

I have 2013 dutchmen 261BHS. The Dinette backside (seats on the right) is very week because of the material it made from.

When ever we get into I always telling my kids to be careful as I am afraid of them breaking it.

It only made from maybe 1/4" cheap board. Attached out the outer slide out wall, floor and the seat cabinets. I have done some reinforcement screws already.

The entire wall is 48 wide about 34 tall. So I considering making a Oak or white hickory. Simple because it very hard wood. I can
Joint about 5 or 6 inches by 1" pieces together and use the existing
one as a template. Giving it a stain and finish to match near the same color.

It will add some weight, which I not worried about. I just want some extra strength to the back.

Any thoughts?
__________________

__________________
---------------------------------------

2014 Dutchmen 261BHS
gazingm42 is offline   Reply With Quote
Old 06-14-2015, 03:33 AM   #2
Senior Member
 
Join Date: Jul 2014
Location: Dalzell
Posts: 714
South Carolina
Speaking of dinettes, our last little Coleman only had one bed, and it was the dinette. Both of us are (ahem) "full-sized." I worried about the table-top supported only on the sides. I made an I-beam of 2x4's, cut to fit exactly beneath the table top to the floor, adding carpet at either end to wedge it and quiet it. It worked great! We've since traded that camper, but keep the I-beam in our current camper, where the dinette is a guest bed.
__________________

MartyG is offline   Reply With Quote
Old 06-17-2015, 03:09 AM   #3
Senior Member
 
gazingm42's Avatar
 
Join Date: May 2013
Location: State of confusion
Posts: 82
Utah
I would just like to get the wall that 1/4 that the back is on replaced with 1" oak. I think it will be much nicer in the long run.
__________________
---------------------------------------

2014 Dutchmen 261BHS
gazingm42 is offline   Reply With Quote
Old 06-17-2015, 04:41 AM   #4
Member
 
Join Date: Jan 2014
Location: Calgary
Posts: 17
Alberta
Mine is the same. It has yet to break. Very cheap construction. Kind of like the rear bunk.
__________________
2013 Dutchmen 261 bhs, polar package
2018 Ram Power Wagon
twinscrew is offline   Reply With Quote
Old 06-27-2015, 04:18 AM   #5
Senior Member
 
gazingm42's Avatar
 
Join Date: May 2013
Location: State of confusion
Posts: 82
Utah
Made the change today!

It came out very nice.

I purchased 15 board feet of 1" red oak. Jointed them together and made a slab 48 X 32 then used the old back board (strong cardboard) that Dutchman used as a template.

After matching stain and varnish I made some nice improvments on the underseats and the wall mounts.

Need less to say very happy.
__________________
---------------------------------------

2014 Dutchmen 261BHS
gazingm42 is offline   Reply With Quote
Old 07-01-2015, 01:25 AM   #6
Senior Member
 
DC8Captain's Avatar
 
Join Date: Aug 2014
Location: Golden
Posts: 178
Colorado
I have a 275BH. How about some pictures please.
__________________
Dale & Deb
2009 Silverado Crew Cab 2500 HD
2014 Dutchmen 275BH TT
DC8Captain is offline   Reply With Quote
Old 07-01-2015, 01:40 AM   #7
Senior Member
 
gazingm42's Avatar
 
Join Date: May 2013
Location: State of confusion
Posts: 82
Utah
I am camping now with very limited internet...
As soon as I get access I will post them online. I choose not to replace the silly top cap.

Looks like your 275bh has the same silly design flaw. Which could use this upgrade.
__________________
---------------------------------------

2014 Dutchmen 261BHS
gazingm42 is offline   Reply With Quote
Old 07-01-2015, 02:14 AM   #8
Senior Member
 
gazingm42's Avatar
 
Join Date: May 2013
Location: State of confusion
Posts: 82
Utah
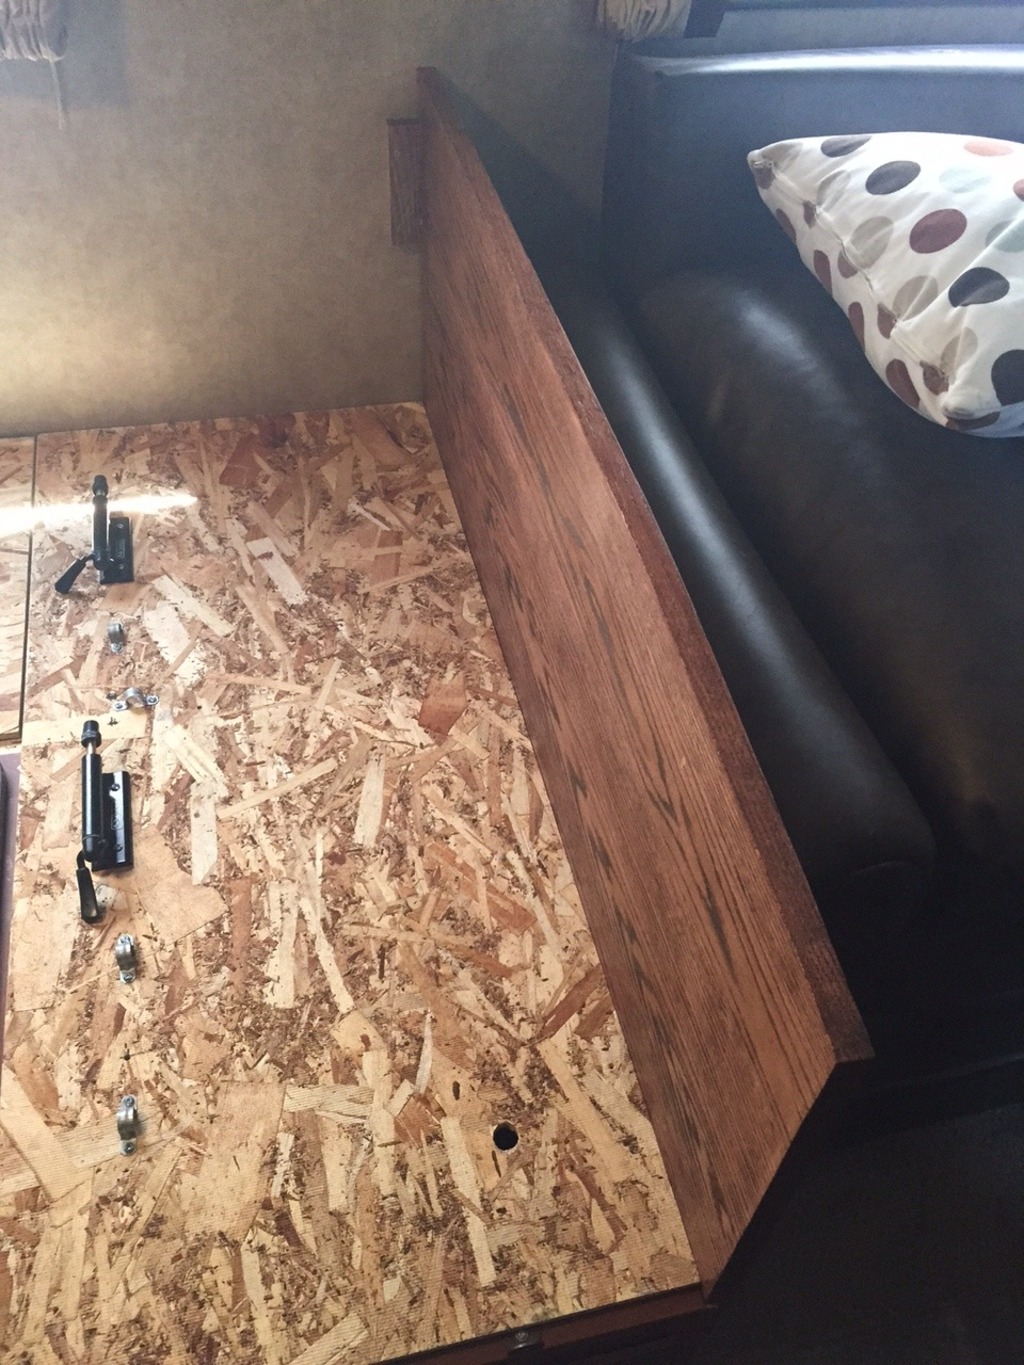
First under the seat it has some 1.5 X 1.5 pine timbers making the seat frame. I doubled it against the backing by putting another one directly under the existing frame. Screw some #8 2" screws in them.

Then in the new back I made a 48" X 32" use the old back as a template and cut it to the same angle to fit the cushion. Then I
add some 1" X 1.5" and glue them to the back. So this I attached to the wall and long one on the floor.

Screwing under frame into the back with the 2" screws, several of them. Since it has a nice one inch top I left that old silly topper made from week cardboard off.


__________________

__________________
---------------------------------------

2014 Dutchmen 261BHS
gazingm42 is offline   Reply With Quote
Reply

Thread Tools
Display Modes

Posting Rules
You may not post new threads
You may not post replies
You may not post attachments
You may not edit your posts

BB code is On
Smilies are On
[IMG] code is On
HTML code is Off
Trackbacks are Off
Pingbacks are Off
Refbacks are Off


» Featured Campgrounds

Reviews provided by

Disclaimer:

This website is not affiliated with or endorsed by Dutchmen RV or any of its affiliates. This is an independent, unofficial site.


All times are GMT. The time now is 11:42 AM.


Powered by vBulletin® Version 3.8.7
Copyright ©2000 - 2024, vBulletin Solutions, Inc.
Copyright 2020 Social Knowledge, LLC All Rights Reserved.
×