 |
|
 09-05-2013, 03:44 AM
|
#21
|
|
Senior Member
Join Date: Jul 2013
Location: kamloops
Posts: 2,152
British Columbia
|
Quote:
Originally Posted by prm99v6

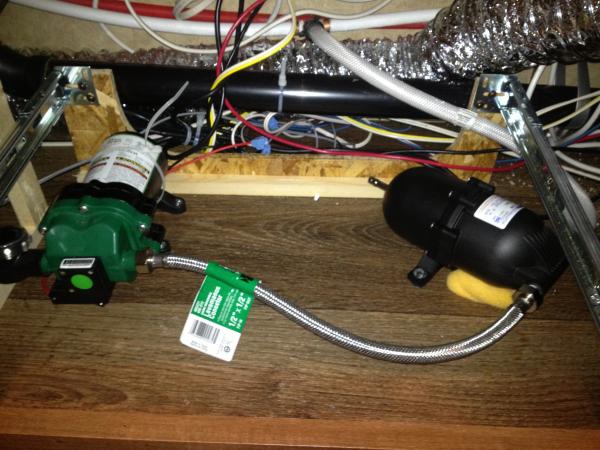
As indicated in a different post, my water pump from the factory was louder that a jack hammer. I found it was not attached to anything and the output line was wrapped around the metal track for the drawer it was under. The brain for the slide out was also located under it (disaster waiting to happen).
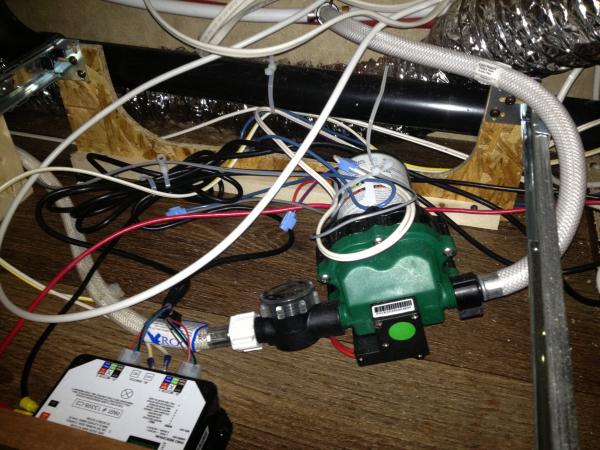
I moved the brain for the slide, mounted the pump to the floor and added a Shurflo Accumulator Tank. The connector hose was a 12" 1/2" to 1/2" extention hose I picked up from Home Depot.
 |
Like wow man.
It's a pity that with the money we pay for Thor's products they would be able to get I right!
I hope you send or have sent a copy of this to the CEO and the rest of the over paid execs at Thor.
We as consumers have to start YELLING at the top of our lungs that we are "mad as hell and won't take it any more.
Believe me they know that I don't play by the 3 strikes rule. They have had two chances now and they have failed on both accounts, they are OUT.
__________________
|

|

|
|
09-05-2013, 03:51 AM
|
#22
|
|
Senior Member
Join Date: Jul 2013
Location: kamloops
Posts: 2,152
British Columbia
|
Quote:
Originally Posted by prm99v6
As indicated in a different post, my water pump from the factory was louder that a jack hammer. I found it was not attached to anything and the output line was wrapped around the metal track for the drawer it was under. The brain for the slide out was also located under it (disaster waiting to happen).
I moved the brain for the slide, mounted the pump to the floor and added a Shurflo Accumulator Tank. The connector hose was a 12" 1/2" to 1/2" extention hose I picked up from Home Depot.
|
Like wow man.
It's a pity that with the money we pay for Thor's products they couldn't to get I right to begin with. All though I can't say I wasn't warned, I was told by the dealer that Dutchmen was all about the glitz and glamor and not so much about quality. I was told, whether it was to sell. Me up or not that Dutchmen is an "entry level product".
I hope you send or have sent a copy of this to the CEO and the rest of the over paid execs at Thor.
We as consumers have to start YELLING at the top of our lungs that we are "mad as hell and won't take it any more.
Believe me they know that I don't play by the 3 strikes rule. They have had two chances now and they have failed on both accounts, they are OUT. No more of my hard earned pension dollars will they be seeing.
__________________
|
|
|
|
|
09-05-2013, 02:32 PM
|
#23
|
|
Member
Join Date: Jul 2013
Location: DFW
Posts: 22
Texas
|
I don't even notice before but those are scotch-locks on the pump wires, those will be getting changed out If I see that on mine.
__________________
Hoping to be a proud owner of a
Kodiak 292 TQB soon.
|
|
|
|
|
09-05-2013, 04:19 PM
|
#24
|
|
Senior Member
Join Date: Aug 2013
Location: Middletown
Posts: 192
Delaware
|
Quote:
Originally Posted by CarterKraft
I don't even notice before but those are scotch-locks on the pump wires, those will be getting changed out If I see that on mine.
|
Your right. I didn't even realize myself. I was just so concerned with getting thing quiet. I will address those when I add the winterizing kit I have waiting to be installed.
__________________
2014 Aerolite 282DBHS
myaeroliterv.com
|
|
|
|
|
09-05-2013, 06:00 PM
|
#25
|
|
Senior Member
Join Date: Aug 2013
Location: Middletown
Posts: 192
Delaware
|
LED lights
LEDs showed up. Before and after pics to follow.


__________________
2014 Aerolite 282DBHS
myaeroliterv.com
|
|
|
|
|
09-05-2013, 11:41 PM
|
#26
|
|
Senior Member
Join Date: Aug 2013
Location: Middletown
Posts: 192
Delaware
|
LED Swap
Before
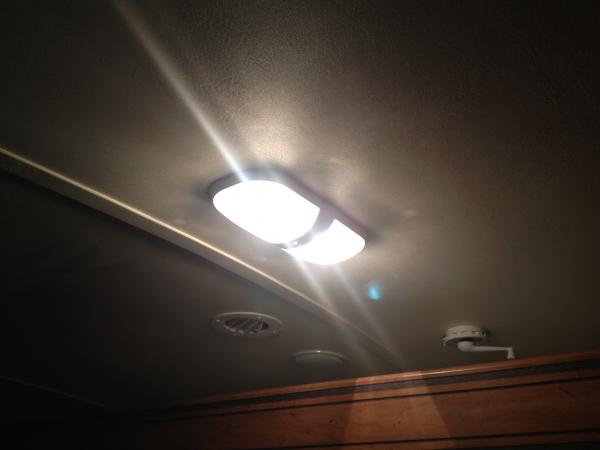
After

Side by side

Almost done
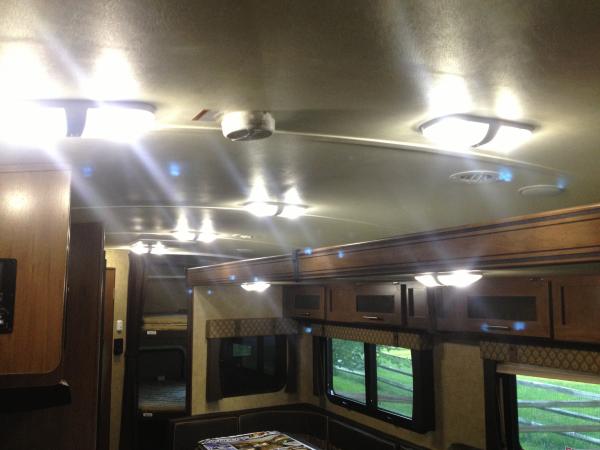
while making the swap I found the two lights in the bunk area already had LEDs. I wonder why these and nothing else.

Everything inside is now LED except the refridgerator light. I swapped the two outside lights as well. The LEDs are a little blue (as to be expected with the rating) but once they were all done there is nothing to compare it to and its no longer obvious.
I do plan on doing the running lights and adding some LEDs to the awning and the steps but that can wait until next season.
__________________
2014 Aerolite 282DBHS
myaeroliterv.com
|
|
|
|
|
09-09-2013, 01:24 AM
|
#27
|
|
Senior Member
Join Date: Aug 2013
Location: Middletown
Posts: 192
Delaware
|
Lend a Hand Handle
Today I installed a Lend a Hand handle to the main entry door of the unit. For some reason Aerolite only installs them on some of their campers. They are onslae now at Campers World for $29. This took 15 minutes. I marked the holes, drilled 4 pilot holes and used black silicone after I mounted the handle. I think I will order one for my second door.


__________________
2014 Aerolite 282DBHS
myaeroliterv.com
|
|
|
|
|
09-09-2013, 05:54 PM
|
#28
|
|
Senior Member
Join Date: Dec 2011
Location: l
Posts: 431
Saskatchewan
|
Your improvements look quite nice! 
I too put on the Oxygenics shower head, but the hose that came with it does not work on the male shower connection. If I take the rubber washer out of the female end then the hose threads on okay. Put the washer back in and the threads won't quite catch. So for now I'm using the original hose that came with the trailer...
Dave.
__________________
Dave & Sue
Kiley & Emily
Izzie (Beagle/Bichon/Mini Poodle)
2012 Ford F150 XLT EB SS CRW 6.5 Max Tow
'12 Dutchmen Kodiak 284BHSL
|
|
|
|
|
09-09-2013, 07:25 PM
|
#29
|
|
Senior Member
Join Date: Feb 2013
Location: Regina
Posts: 235
Saskatchewan
|
When you put in the Lend a Hand handle was there something substantial behind to screw into? We toured a Spree 19foot (made by KZ) on the weekend and it did not have the handle. Our relatives would like one put on for their safety and I said I would research it. Second question - did you use anything special for the screws? Thanking you in advance for your time in answering my post.
__________________
"We were not placed on this earth to see through one another, but rather to see one another through!"
2013 Timber Ridge, 2013 GMC Sierra 6.2 L
|
|
|
|
|
09-09-2013, 11:13 PM
|
#30
|
|
Senior Member
Join Date: Aug 2013
Location: Middletown
Posts: 192
Delaware
|
Quote:
Originally Posted by knesdad
Your improvements look quite nice!
I too put on the Oxygenics shower head, but the hose that came with it does not work on the male shower connection. If I take the rubber washer out of the female end then the hose threads on okay. Put the washer back in and the threads won't quite catch. So for now I'm using the original hose that came with the trailer...
Dave. |
Thanks!
I lucked out. I was able to use the new hose.
__________________
2014 Aerolite 282DBHS
myaeroliterv.com
|
|
|
|
|
09-09-2013, 11:19 PM
|
#31
|
|
Senior Member
Join Date: Aug 2013
Location: Middletown
Posts: 192
Delaware
|
Quote:
Originally Posted by kayakcrazy
When you put in the Lend a Hand handle was there something substantial behind to screw into? We toured a Spree 19foot (made by KZ) on the weekend and it did not have the handle. Our relatives would like one put on for their safety and I said I would research it. Second question - did you use anything special for the screws? Thanking you in advance for your time in answering my post. |
I had called Aerolite to confirm and was told that aluminum structure surrounds the doors and windows and that's what the factory handle is attached to. I was more than nervous but said what the heck. Using a very small bit as a test I drilled through the fiberglass and wood, then hit metal. Once I knew it was good I stepped up the drill bit a little. I ended up just using the screws that came with the handle (filled holes with silicon) and even though the instructions said sealing is not necessary I sealed around the edge of the base as well. As you can see I left the factory handle in place so I didn't have any bodywork to do.
__________________
2014 Aerolite 282DBHS
myaeroliterv.com
|
|
|
|
|
09-14-2013, 03:20 AM
|
#32
|
|
Senior Member
Join Date: Aug 2013
Location: Middletown
Posts: 192
Delaware
|
More LEDs
Well I was at it again.
I used the easy method to convert all of my marker lights to LED with the Bargman conversion kit. Did all of the red and amber lights. I still haven't found something I like to replace the huge factory tails, so for now I replaced the bulbs with LEDs.
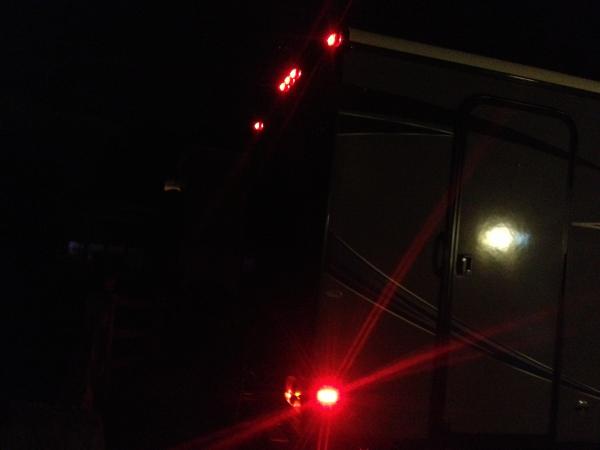
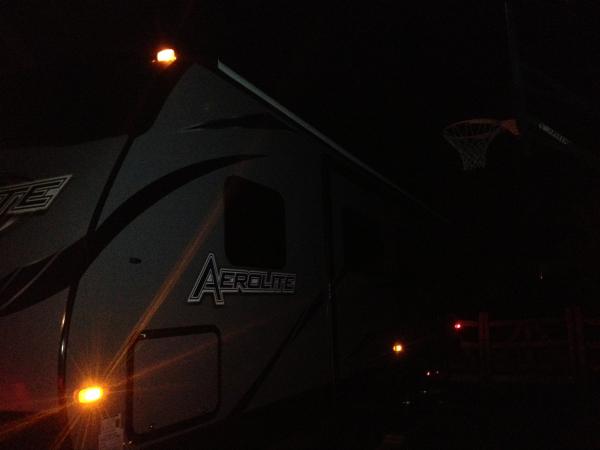
Here the top two amber lights have not been switched yet. You can see how much brighter the lower ones are.
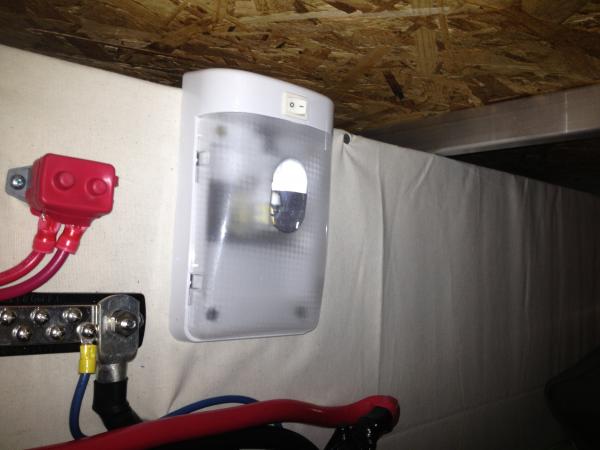
Since I had extra LED bulbs left from the interior conversion (because two lights had LEDs from the factory) I added two single bulb housings (one on each side) of the pass-through. Now I have plenty of energy efficient light in the storage area.

Well see what I find at the Hershey RV show tomorrow!
__________________
2014 Aerolite 282DBHS
myaeroliterv.com
|
|
|
|
|
10-02-2013, 08:50 PM
|
#33
|
|
Senior Member
Join Date: Aug 2013
Location: Middletown
Posts: 192
Delaware
|
Quick Kitchen Upgrades
First these are really mods but quick fixes.
1. Needed a garbage can for the kitchen. Picked up a standard kitchen can from Home Depot for $8 and used 3M wall hooks to hold in in place during travel. Well know in a couple of weeks if they hold or if I need to use a bungee cord.

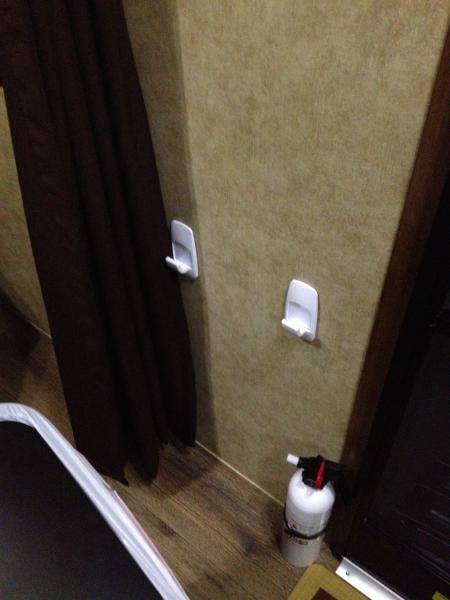
2. Same for the paper towel holder. I moved the light over about five inches so I could mount a holder under the cabinet.
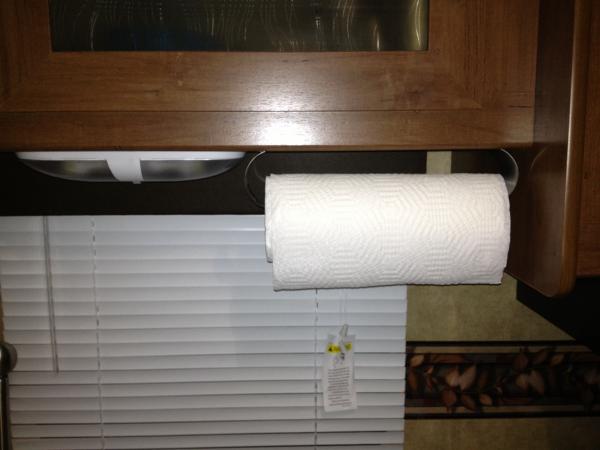
3. Lastly, my unit definitely lacks counter space and it did not come with sink covers. So I picked up a simple bamboo cutting board and used rubber feet (Home Depot) mounted to the bottom to keep it from sliding around. I think I am going to pick up another one for the other side!


__________________
2014 Aerolite 282DBHS
myaeroliterv.com
|
|
|
|
|
10-03-2013, 12:26 AM
|
#34
|
|
Senior Member
Join Date: Dec 2012
Location: Tahlequah
Posts: 3,079
Oklahoma
|
That all looks good and functional, now get rid of that baby fire extinguisher and get one that will do the job.
When you do get a real fire extinguisher mount it on the wall where you and others can see it if need be.
__________________
2013 Voltage 3800, 2012 Chevy 3500 HD
2010 Yamaha V Star 950
2009 Yamaha Raider
Volunteering with Habitat for Humanity Caravanners
|
|
|
|
|
12-28-2013, 08:01 PM
|
#35
|
|
Senior Member
Join Date: Aug 2013
Location: Middletown
Posts: 192
Delaware
|
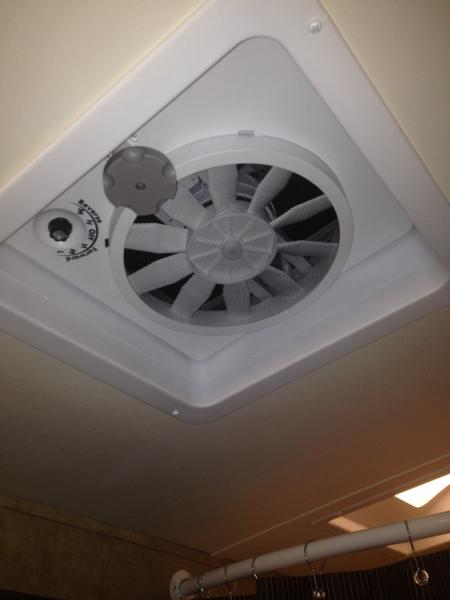
Santa was good to me. I received the Vortex II to upgrade the cheesy bathroom fan, a Maxxfan 7500 to replace the vent in the bedroom, a stove cover for a little more usable space, a Weber Q2200 (replaces teh 220) for some outdoor cooking, another lend a hand for the bathroom door, and the Air Lift wireless controler for my air bags in the truck.
We had a nice day today with the temps in the mid 50's so I installed the stove top cover and the Vortex II. everything else will wait until the spring when I uncover it.
The Vortex was easy to do.


__________________
2014 Aerolite 282DBHS
myaeroliterv.com
|
|
|
|
|
12-28-2013, 11:34 PM
|
#36
|
|
Senior Member
Join Date: Sep 2012
Location: Old Forge
Posts: 886
New York
|
Boy Santa dropped off everything at your house.......
__________________
Kathy & Leo ~Adirondack Mtn. Region of NY
2013 Rubicon 2900 Toy hauler
2010 Ford F-350 4x4 Lariat Dually Super Crew Diesel
|
|
|
|
|
03-24-2014, 04:47 PM
|
#37
|
|
Senior Member
Join Date: Aug 2013
Location: Middletown
Posts: 192
Delaware
|
Spring has sprung
Even though the weather can't make up its mind, I was able to get some things done on one beautiful day.
Installed grab bars on both screen doors. I will be adding plexy to the bottom or entire door (haven't decided yet).

Then I installed the LED light strip I got (I can say that the self adhesive does not work). I installed the strip on the bottom of the flange where the awning is attached to the trailer. I wanted it here so that the light is usable even if the awning is rolled up. I started with the end without the connection and started sticking it in place (after cleaning the area liberally with alcohol). Once up I used silicone on the ends and then drilled a hole through the wall of the camper to run the wires. The put the connections into the closet where I mounted the white control box. I then ran the connection into through the pantry, through the refrigerator cabinet, and behind the microwave to where the main control/switch panel is. I tapped into the twelve volts for the existing outside light. The eye for the remote is in the clsoet where the control box is (double face taped to the wall). I don't need the ability to change colors from outside. If I want to do that, I just go to the closet. The important thing for me was utilizing the existing switch.

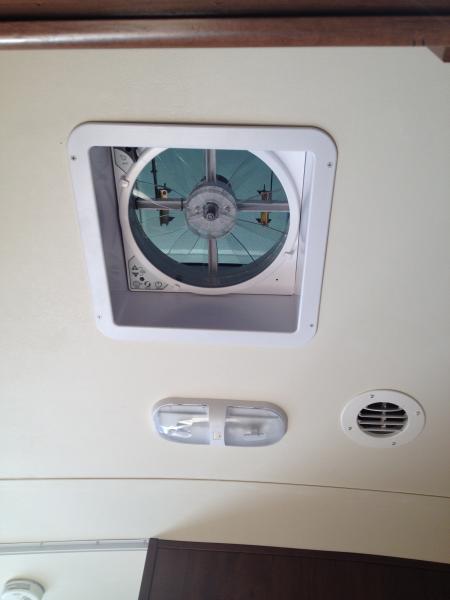
Next up was the Maxxair 7500 fan for the bedroom. There was no fan so I pulled the vent and added the Maxxair. Currently the power is connected to an existing light in the room but I started running a direct feed from the fuse panel to the area (got about half way so far) but since I am running LEDs in all my lights, I don't think the extra draw will be an issue.
Here is exiting vent-removing lap sealant is a pain!

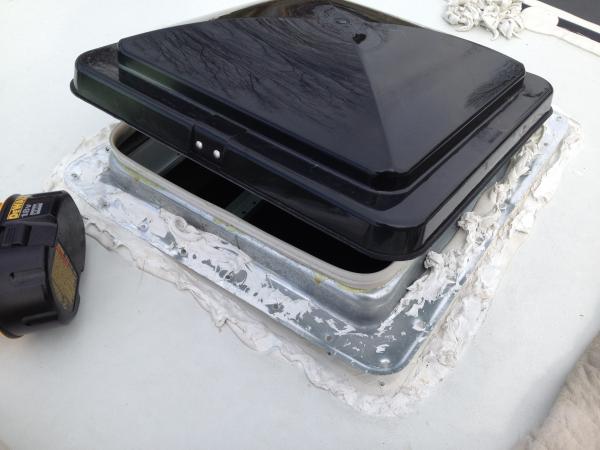
The big hole

New flange

Outside done

From the inside

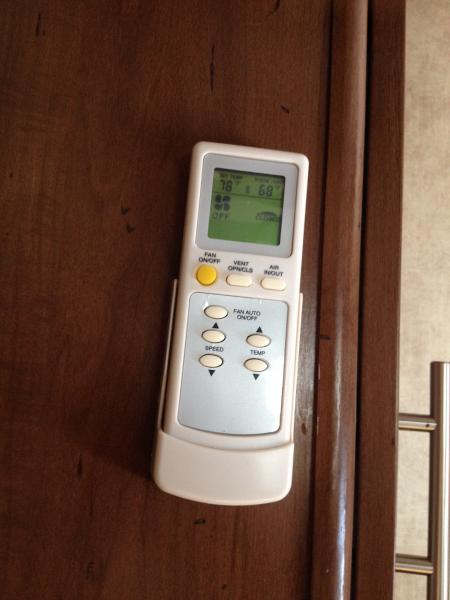
Remote-the pic is crooked, not the remote
__________________
2014 Aerolite 282DBHS
myaeroliterv.com
|
|
|
|
|
03-24-2014, 04:48 PM
|
#38
|
|
Senior Member
Join Date: Aug 2013
Location: Middletown
Posts: 192
Delaware
|
outside


Finally, I installed a second Lend-a Hand handle on the bathroom door. It's the same one that I used on the main door above.
__________________
2014 Aerolite 282DBHS
myaeroliterv.com
|
|
|
|
|
03-24-2014, 04:59 PM
|
#39
|
|
New Member
Join Date: Jan 2014
Location: Northern
Posts: 5
Colorado
|
Do you have a daytime picture of where the LED strip is installed, and where you ran the power through into the cabinet? I'm having a hard time picturing how you did that, but I have my LED strip waiting to be installed. Did you use 3M tape to install it? I've heard from the reviews that the attached adhesive tape isn't very good.
Thanks for the updates!
|
|
|
|
|
03-24-2014, 05:50 PM
|
#40
|
|
Senior Member
Join Date: Aug 2013
Location: Middletown
Posts: 192
Delaware
|
Quote:
Originally Posted by Canuckistani
Do you have a daytime picture of where the LED strip is installed, and where you ran the power through into the cabinet? I'm having a hard time picturing how you did that, but I have my LED strip waiting to be installed. Did you use 3M tape to install it? I've heard from the reviews that the attached adhesive tape isn't very good.
Thanks for the updates!
|
I dont have pics but I will take some. I used the existing 3M tape that was on the strip. It did not work, as when I came out the next day parts were hanging down. I ended up running a bead of black silicone along the edge (had already done both ends). I also forgot to mention that I used black expanding foam to fill the hole from where I ran the wire through the hole. I went over the foam with black silicon on the outside and covered the white wire with a small piece of black flex loom. I guess some people replace the 3M tape from the very beginning.
__________________
__________________
2014 Aerolite 282DBHS
myaeroliterv.com
|
|
|
|
|
|
 Posting Rules
|
You may not post new threads
You may not post replies
You may not post attachments
You may not edit your posts
HTML code is Off
|
|
|
|
 » Recent Discussions
 |
|
|
|
|
|
|
|
|
|
|
|
|
|
|
|
|
|
|
|
|
|
|
|
|
|
|
|
|
|
|
|


 Linear Mode

